2. Hur du skapar din miljö

Innan du börjar programmera behöver vi installera några saker. Använder du en skoldator? Yay! Då kanske allt redan är installerat. Läs igenom den här delen oavsett, för du kan behöva skapa en miljö på din egen dator i framtiden.
Att få till sin miljö så att du kan börja kan kräva en del tålamod. Ge inte upp. När det är klart behöver du inte tänka på det i fortsättningen, utan kan fokusera på själva programmeringen. Det är vanligt att fastna vid något installationssteg, så tveka inte att be om hjälp.
2.1. Setup the Programming Environment

I det här kapitlet visar vi hur du:
Installerar en ”IDE” där du skriver in dina program. (Vi använder ett program som heter PyCharm. Du kan använda versionen ”Community Edition” gratis, och om du har en e-post som slutar med
.edukan du få en gratis studentlicens för ”Professional Edition”.)installerar programspråket Python.
gör en enkel inställning så att vi kan se filändelser.
In the next chapter we’ll cover:
A version control system to track and turn in your work. (Git)
Setup with the Arcade code library and a template project.
Let’s go through these items in detail.
2.1.1. Installing an IDE
We need an editor. Python comes with an editor called IDLE, but it is awful and not worth using. We’ll use an editor called PyCharm.
PyCharm is a powerful program that lets you do more than just edit the program, it also includes a large set of tools that programmers need. This type of environment is called an Integrated Development Environment, or IDE for short.
Download and install PyCharm.
You can use their community edition for free. We won’t use the
features in the professional edition. If you decide to
pick the professional edition anyway,
you’ll need a license to use it.
But licenses are free for educational use!
If you have an e-mail that ends in .edu you can
ask for a student license. It can be used on a school computer, or on your own
computer.
2.1.2. Installing Python
We will be using the ”Python” computer programming language. (We’ll learn more about what a computer language is in the What is a Programming Language? chapter. Also, the creator of Python was a fan of Monty Python, hence the name.)
Viktigt
Python Version Requirement: This book requires Python 3.10 or higher. The Arcade library (version 3.3+) requires at least Python 3.10.
When downloading Python, make sure to get version 3.10 or newer. As of this writing, Python 3.13 is the latest version and works perfectly with Arcade.
When installing Python, make sure to add Python to the path (1) before clicking the Install button (2).
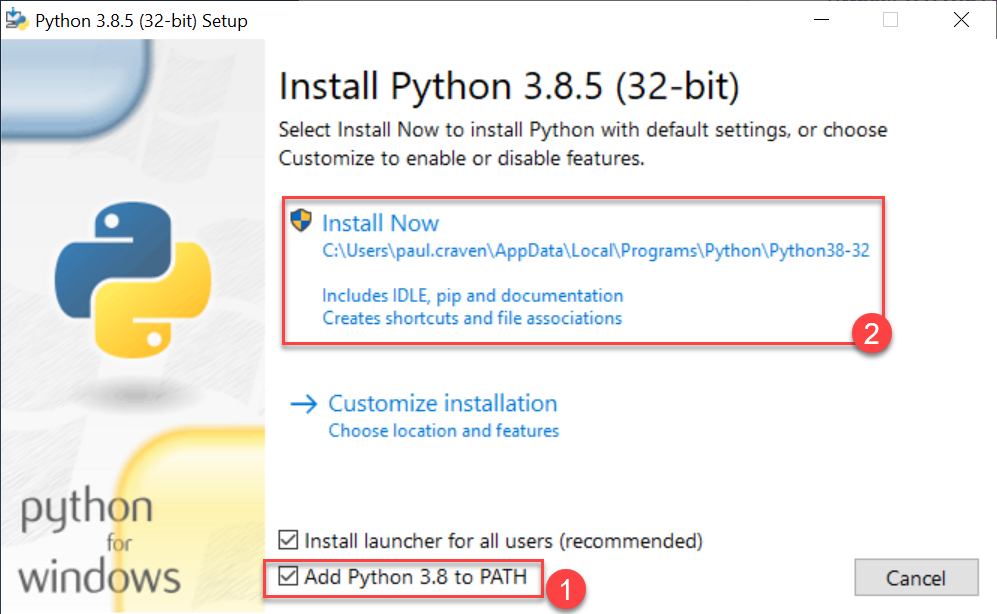
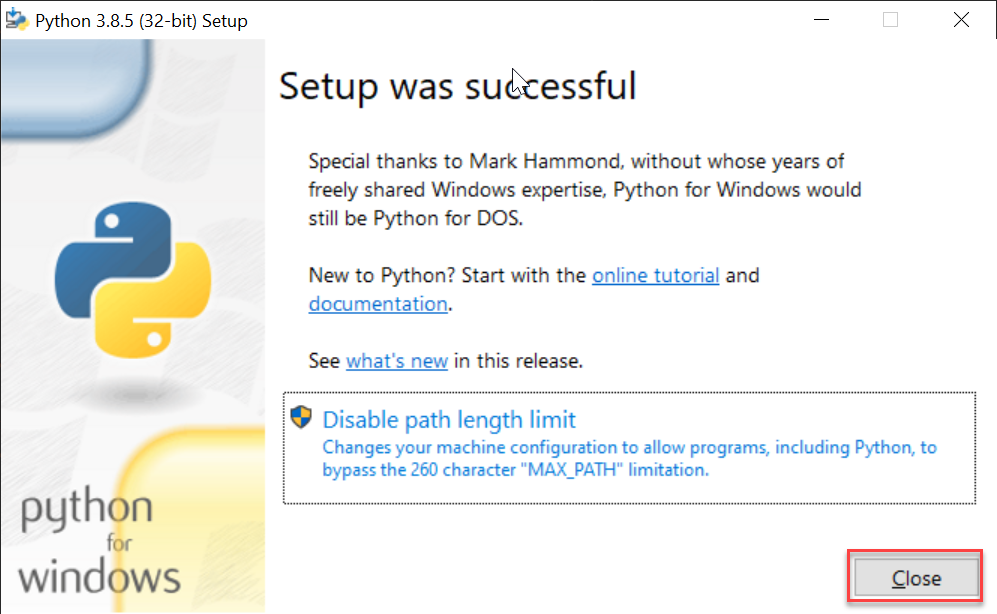
After that, you can just close the dialog. There’s no need to increase the path length, although it doesn’t hurt anything if you do.
2.2. Viewing File Extensions
It is a great idea to change your windows configuration to show file extensions.
A file usually has a name like Book report.docx where the .docx tells the
computer it is a Microsoft Word compatible document. By default Windows
hides the .docx extension if there is a program installed to handle it.
If you are programming, this hiding part of the file name can be annoying.
For Windows 8 and 10, bring up a file explorer by hitting the Windows-E key. Then click the ”view” tab and make sure ”File name extensions” has been checked.

We’ll need to see the full filename for our programs. Our Python language
programs will end in .py and we need to see the extensions of the image
and sound files we’ll load into our games.