2. Setting Up Your System
Before you begin programming, we need to install a few things. Using a school computer? Yay! You may have these already installed. Still, read through this part, as you might need to set up your own system in the future.
Getting a system set up and ready to program can be a bit frustrating. Don’t give up. Once you’ve got a system set up for programming you don’t need to think about it again. You can concentrate on the programming part. It is normal to get stuck during setup, so don’t hesitate to reach out and get help.
2.1. Setup the Programming Environment
In this chapter we’ll show you how to:
Install an “IDE” to type in your programs. (We’ll use a program called PyCharm. You can use the community edition for free, or if you have an email address that ends in
.eduget can get a free student license for the professional version.)Install the Python programming language.
A minor configuration tweak so we can see file extensions.
In the next chapter we’ll cover:
A version control system to track and turn in your work. (Git)
Setup with the Arcade code library and a template project.
Let’s go through these items in detail.
2.1.1. Installing an IDE

We need an editor. Python comes with an editor called IDLE, but it is awful and not worth using. We’ll use an editor called PyCharm.
PyCharm is a powerful program that lets you do more than just edit the program, it also includes a large set of tools that programmers need. This type of environment is called an Integrated Development Environment, or IDE for short.
Download and install PyCharm.
You can use their community edition for free. We won’t use the
features in the professional edition. If you decide to
pick the professional edition anyway,
you’ll need a license to use it.
But licenses are free for educational use!
If you have an e-mail that ends in .edu you can
ask for a student license. It can be used on a school computer, or on your own
computer.
2.1.2. Installing Python
We will be using the “Python” computer programming language. (We’ll learn more about what a computer language is in the What is a Programming Language? chapter. Also, the creator of Python was a fan of Monty Python, hence the name.)
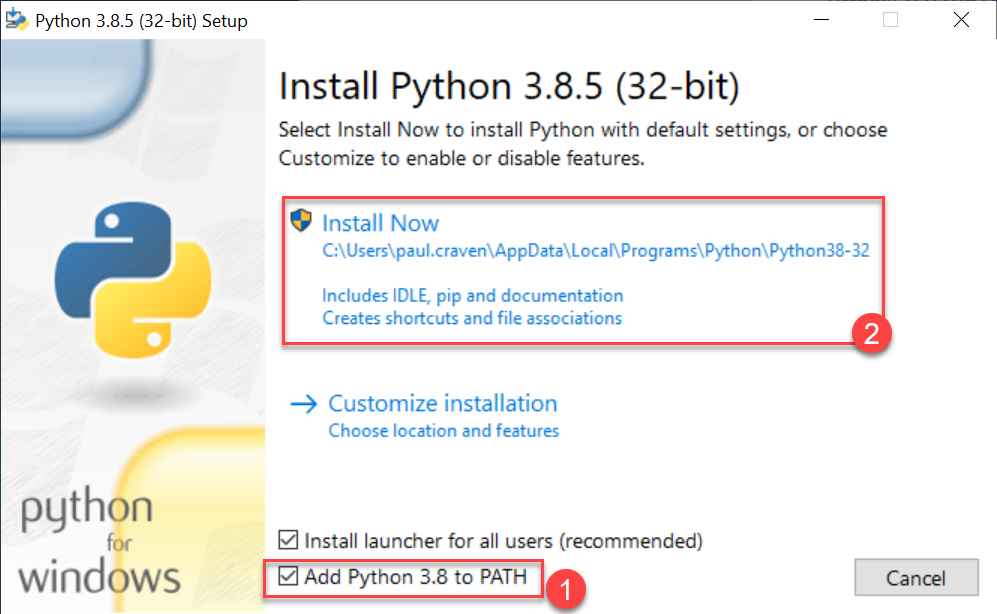
When installing Python, make sure to add Python to the path (1) before clicking the Install button (2).

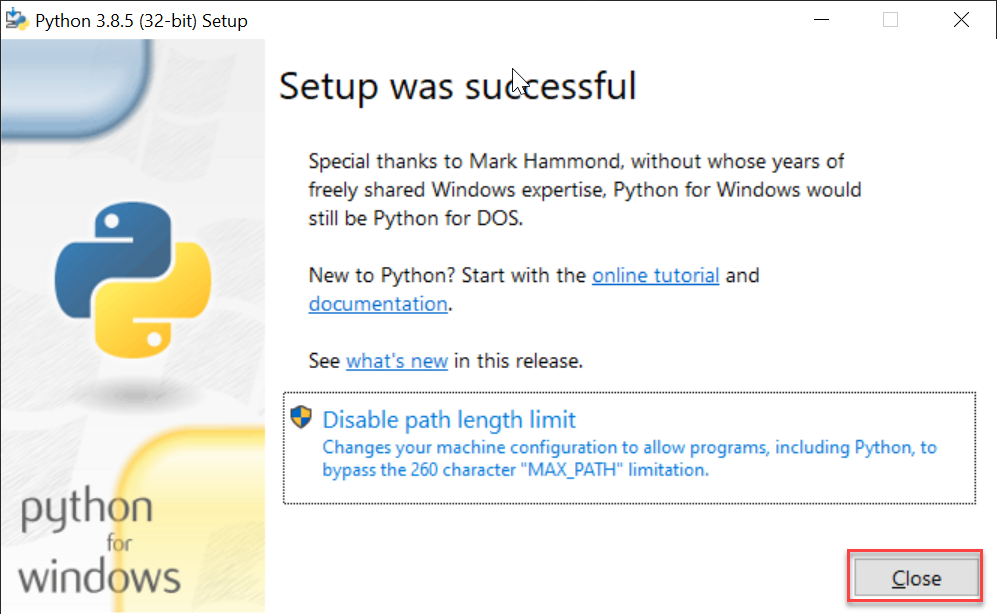
After that, you can just close the dialog. There’s no need to increase the path length, although it doesn’t hurt anything if you do.

2.2. Viewing File Extensions
It is a great idea to change your windows configuration to show file extensions.
A file usually has a name like Book report.docx where the .docx tells the
computer it is a Microsoft Word compatible document. By default Windows
hides the .docx extension if there is a program installed to handle it.
If you are programming, this hiding part of the file name can be annoying.
For Windows 8 and 10, bring up a file explorer by hitting the Windows-E key. Then click the “view” tab and make sure “File name extensions” has been checked.

We’ll need to see the full filename for our programs. Our Python language
programs will end in .py and we need to see the extensions of the image
and sound files we’ll load into our games.