29. Platformers
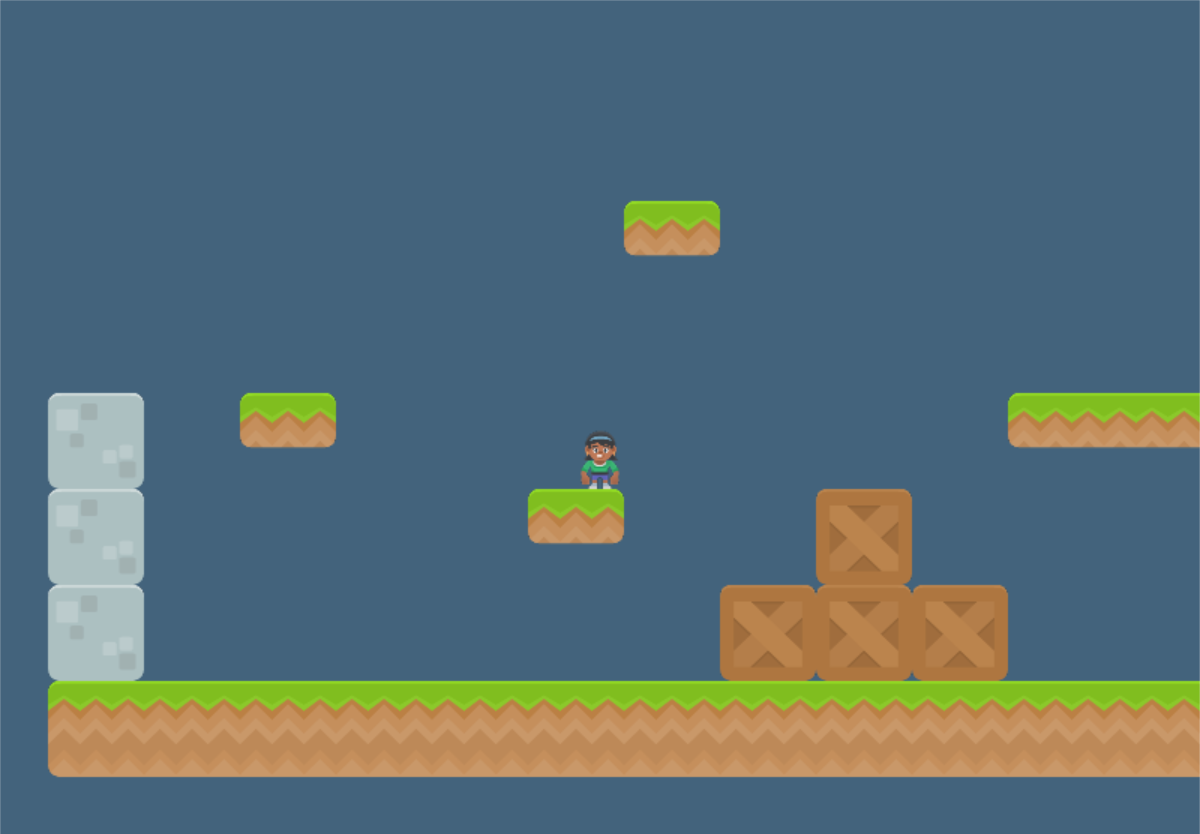
In Sprites and Walls we learned how to keep sprites from moving through walls. How can we expand on that to create a side-scrolling platformer game? This chapter has three goals to aid in that:
Get an easier way to position our tiles and create a level
Add in gravity
Find a way to jump
29.1. Using the Tiled Map Editor
We learned how to lay out sprite walls via code, but wouldn’t it be better to do that visually?
There’s a great editor called Tiled. Arcade can load in files that Tiled saves and easily make
a SpriteList out of them.
To get started, download and install Tiled from here: https://www.mapeditor.org/
Next, start up the program and create a new map. From the menu bar select File → New → New Map and then you should get this window:
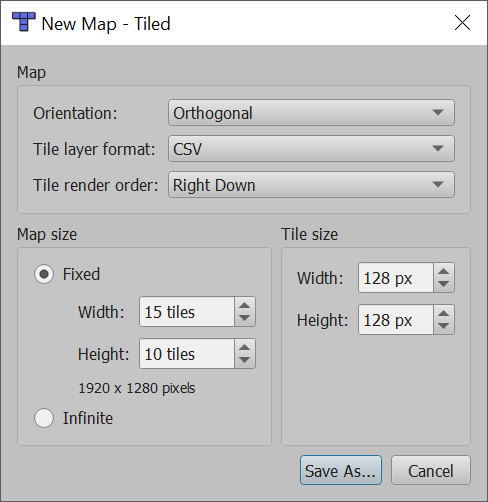
When you create your map, make sure that you set the tile size to be the same as the size of your tiles. All your tiles need to be the same size. You can use your own same-sized tiles, or find some on the web. I highly recommend the Game Asset packs from Kenney.nl. Those tile resources are 128x128 pixels.
To get started, create a small map. I suggest 15 wide, by 10 high. You can always make it bigger after you get things working.
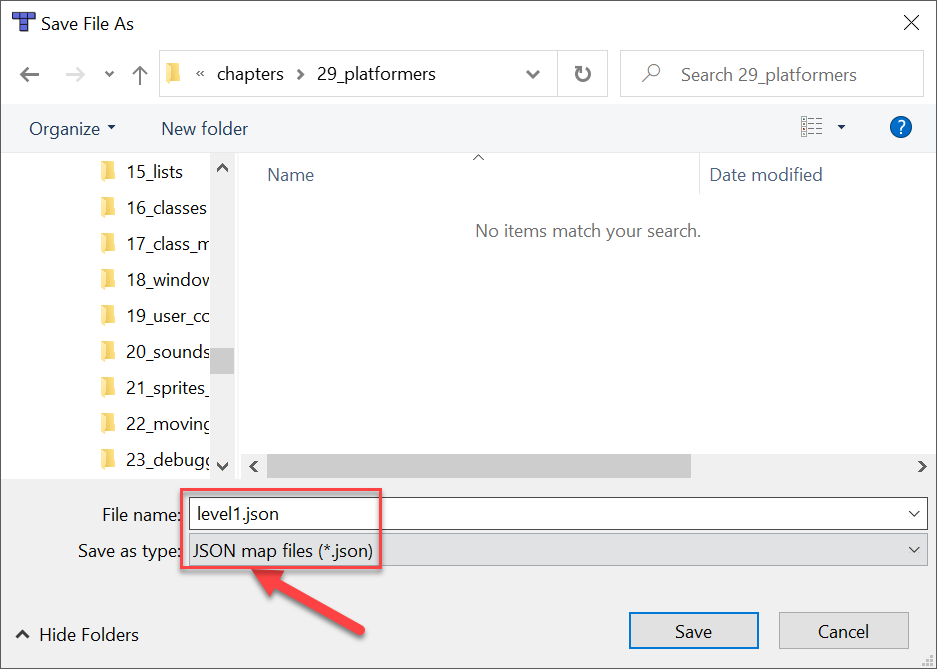
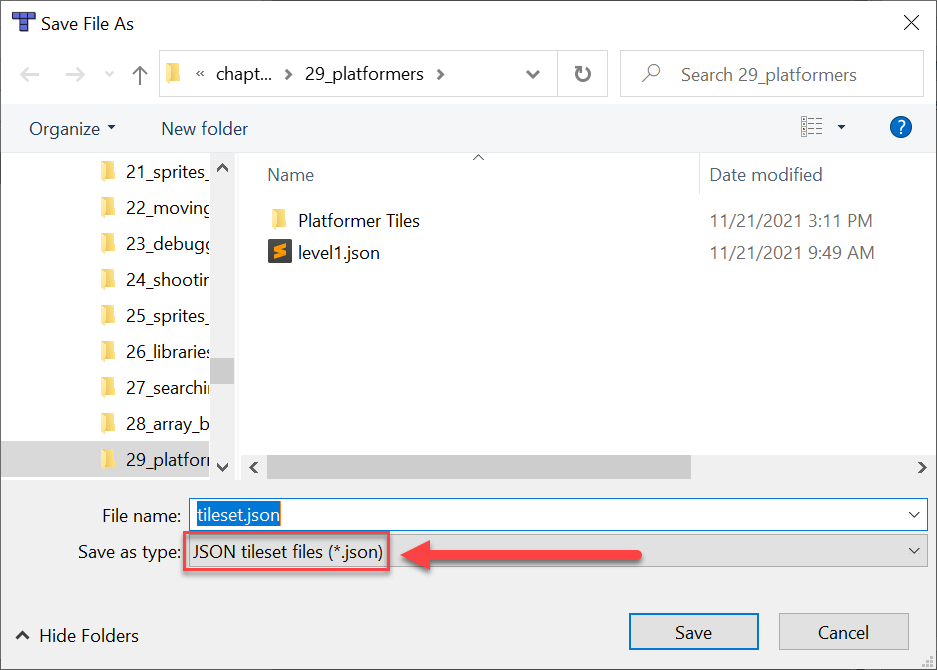
Make sure tileset and map are stored in JSON format. Currently the Tiled program defaults to the TMX format both for the map and the tileset.
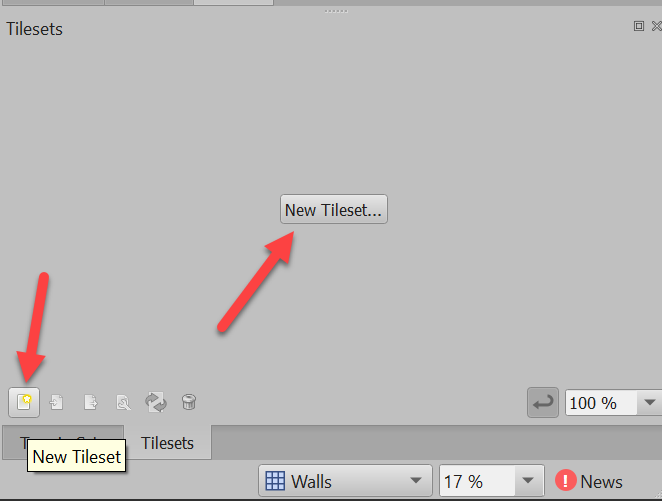
So great! We’ve got a map now. But we can’t really draw on the map. Before you can start drawing anything with your map, you’ll need a tileset. A tileset is a collection of tiles that you can use to ‘paint’ onto your map.
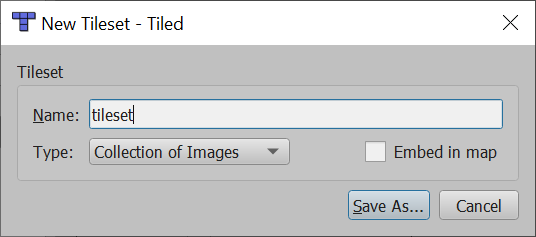
It is a little hidden, but there are a couple buttons in the lower right that will create a new tileset. Either one works, but the big button only shows up when you don’t already have a tileset loaded.
Once you’ve clicked to create a tileset, you can either have a tileset made out of one image that has all the tiles, or a collection of individual images. I usually manage the sprites as a collection of individual files.
You can embed the tileset into your map file, or keep it as a separate file. Keeping it as a separate file will allow you to reuse the tileset across multiple maps.
When you save the tileset, make sure you save it in JSON format:
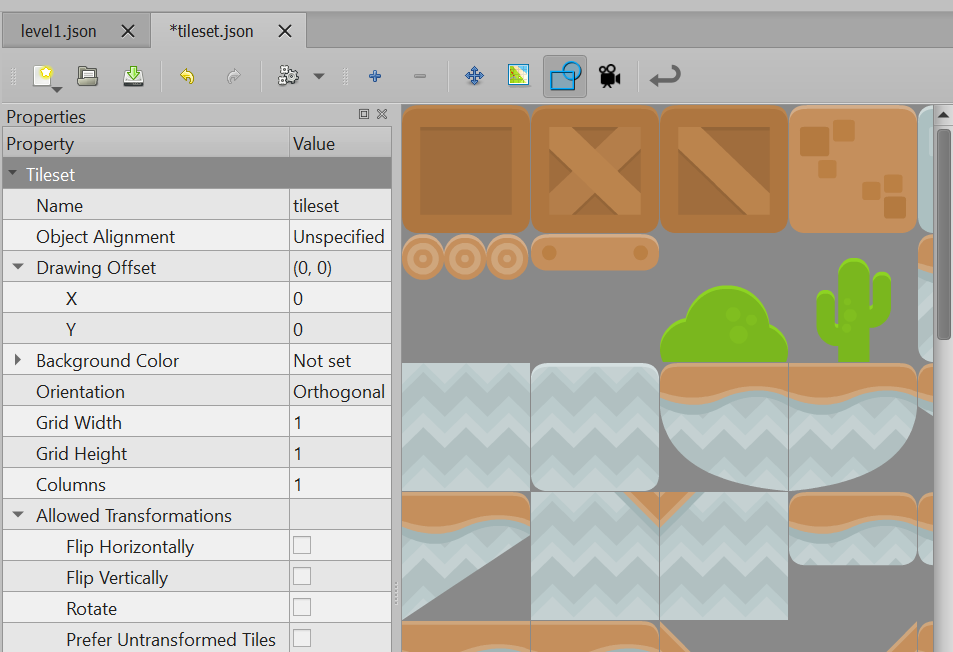
You should have two tabs now. One for your map, one for your tileset. Now we need to add our individual tile images to our tileset. Click the plus button:

You can select all the images in a folder by clicking Ctrl-A for “All”. Then you’ll have those tiles in the tileset:
Next, draw out your map. Also, change the name of your layer from “Layer 1” to something like “Walls”. (That’s what we’ll use in our code examples.)
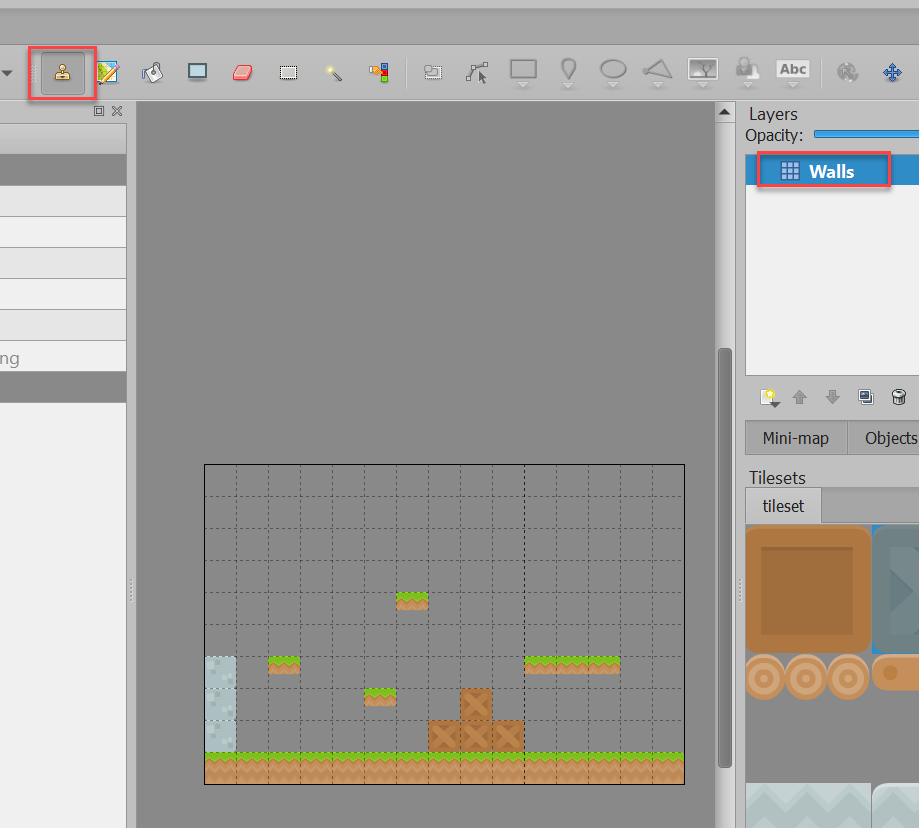
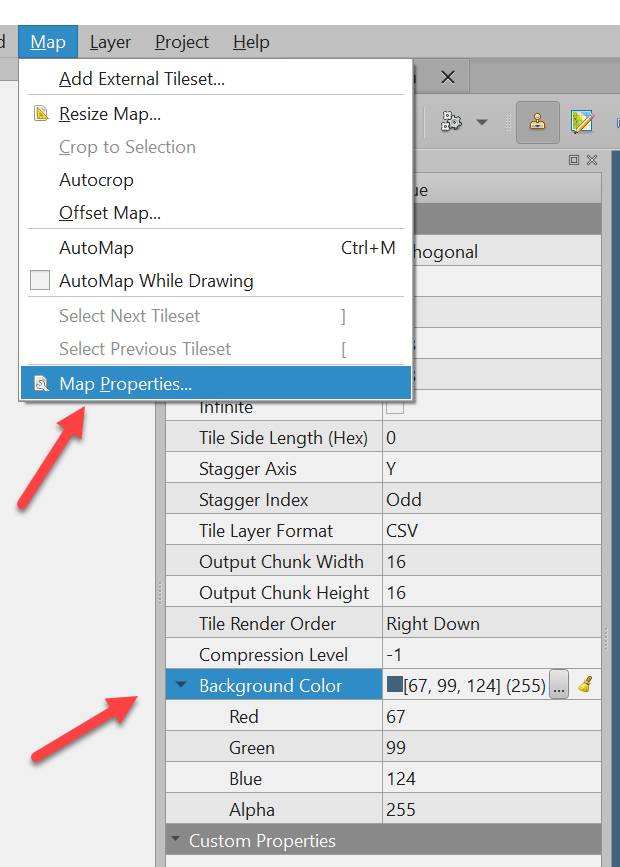
You should also select a background color for your map:
Once you’ve planned out a quick sample map, make sure you save both the map and the tileset. If there is an asterisk (*) in the tab at the top, the file is not saved.
Now, let’s try to load it.
29.2. Loading the Tiled Map
To get your map up and working, start with this code that supports moving around a scrolling window: https://api.arcade.academy/en/latest/examples/sprite_move_scrolling.html
Remove the code in setup that places the blocks, and replace it with
this code to load our map instead:
# Set this to the name of your map.
# Make sure it is saved in the same directory as your program.
map_name = "level1.json"

# Read in the tiled map
self.tile_map = arcade.load_tilemap(map_name, scaling=TILE_SCALING)

# Set wall SpriteList and any others that you have.
self.wall_list = self.tile_map.sprite_lists["Walls"]
# self.coin_list = self.tile_map.sprite_lists["Coins"]

# Set the background color to what is specified in the map
if self.tile_map.background_color:
    arcade.set_background_color(self.tile_map.background_color)
Right after that code (still in setup), we need our physics engine.
If we want a side-scroller with gravity instead of a top-down
view, we replace SimplePhysicsEngine with PhysicsEnginePlatformer. Then we also add
in a GRAVITY constant. Try setting it to 0.5 to start.
# Keep player from running through the wall_list layer
self.physics_engine = arcade.PhysicsEnginePlatformer(
    self.player_sprite, self.wall_list, gravity_constant=GRAVITY
)
Then, adjust your on_key_press method to support jumping.
The PhysicsEnginePlatformer has a built-in method called can_jump
that looks to see if the player has a solid block right below her. If she does,
then the function returns true. This keeps the player from being able to jump
in the air. Set the JUMP_SPEED constant to 10 to start with, and adjust until
you get it where you like.
def on_key_press(self, key, modifiers):
    """ Called whenever a key is pressed. """

    # Does the player want to jump?
    if key == arcade.key.SPACE:
        # See if there is a floor below us
        if self.physics_engine.can_jump():
            self.player_sprite.change_y = JUMP_SPEED
    elif key == arcade.key.LEFT:
        self.player_sprite.change_x = -PLAYER_MOVEMENT_SPEED
    elif key == arcade.key.RIGHT:
        self.player_sprite.
        change_x = PLAYER_MOVEMENT_SPEED
A full listing:
1 2 3 4 5 6 7 8 9 10 11 12 13 14 15 16 17 18 19 20 21 22 23 24 25 26 27 28 29 30 31 32 33 34 35 36 37 38 39 40 41 42 43 44 45 46 47 48 49 50 51 52 53 54 55 56 57 58 59 60 61 62 63 64 65 66 67 68 69 70 71 72 73 74 75 76 77 78 79 80 81 82 83 84 85 86 87 88 89 90 91 92 93 94 95 96 97 98 99 100 101 102 103 104 105 106 107 108 109 110 111 112 113 114 115 116 117 118 119 120 121 122 123 124 125 126 127 128 129 130 131 132 133 134 135 136 137 138 139 140 141 142 143 144 145 146 147 148 149 150 151 152 153 154 155 156 157 158 159 160 161 162 163 164 165 166 167 168 169 170 171 172 173 174 175 176 177 178 179 180 181 | import arcade SPRITE_SCALING = 0.5 TILE_SCALING = 0.5 GRID_PIXEL_SIZE = 128 GRAVITY = 0.25 DEFAULT_SCREEN_WIDTH = 800 DEFAULT_SCREEN_HEIGHT = 600 SCREEN_TITLE = "Sprite Move with Scrolling Screen Example" # How many pixels to keep as a minimum margin between the character # and the edge of the screen. VIEWPORT_MARGIN = 220 # How fast the camera pans to the player. 1.0 is instant. CAMERA_SPEED = 0.1 # How fast the character moves PLAYER_MOVEMENT_SPEED = 7 JUMP_SPEED = 10 class MyGame(arcade.Window): """ Main application class. """ def __init__(self, width, height, title): """ Initializer """ super().__init__(width, height, title, resizable=True) # Sprite lists self.player_list = None self.wall_list = None # Set up the player self.player_sprite = None # Physics engine so we don't run into walls. self.physics_engine = None # Track the current state of what key is pressed self.left_pressed = False self.right_pressed = False # Store our tile map self.tile_map = None # Create the cameras. One for the GUI, one for the sprites. # We scroll the 'sprite world' but not the GUI. self.camera_sprites = arcade.Camera2D() self.camera_gui = arcade.Camera2D() def setup(self): """ Set up the game and initialize the variables. """ # Sprite lists self.player_list = arcade.SpriteList() self.wall_list = arcade.SpriteList() # Set up the player self.player_sprite = arcade.Sprite(":resources:images/animated_characters/female_person/femalePerson_idle.png", scale=0.4) self.player_sprite.center_x = 256 self.player_sprite.center_y = 512 self.player_list.append(self.player_sprite) # --- Load our map # Read in the tiled map map_name = "level1.json" self.tile_map = arcade.load_tilemap(map_name, scaling=TILE_SCALING) # Set wall and coin SpriteLists # Any other layers here. Array index must be a layer. self.wall_list = self.tile_map.sprite_lists["Walls"] # self.coin_list = self.tile_map.sprite_lists["Coins"] # --- Other stuff # Set the background color if self.tile_map.background_color: arcade.set_background_color(self.tile_map.background_color) # Keep player from running through the wall_list layer self.physics_engine = arcade.PhysicsEnginePlatformer( self.player_sprite, self.wall_list, gravity_constant=GRAVITY ) def on_draw(self): """ Render the screen. """ # Clear the screen to the background color self.clear() # Select the camera we'll use to draw all our sprites self.camera_sprites.use() # Draw all the sprites. self.wall_list.draw() self.player_list.draw() # Select the (unscrolled) camera for our GUI self.camera_gui.use() # Draw the GUI arcade.draw_rect_filled(arcade.XYWH(self.width // 2, 20, self.width, 40), arcade.color.ALMOND) text = f"Scroll value: ({self.camera_sprites.position[0]:5.1f}, " \ f"{self.camera_sprites.position[1]:5.1f})" arcade.draw_text(text, 10, 10, arcade.color.BLACK_BEAN, 20) def on_key_press(self, key, modifiers): """ Called whenever a key is pressed. """ if key == arcade.key.UP: if self.physics_engine.can_jump(): self.player_sprite.change_y = JUMP_SPEED elif key == arcade.key.LEFT: self.left_pressed = True elif key == arcade.key.RIGHT: self.right_pressed = True def on_key_release(self, key, modifiers): """Called when the user releases a key. """ if key == arcade.key.LEFT: self.left_pressed = False elif key == arcade.key.RIGHT: self.right_pressed = False def on_update(self, delta_time): """ Movement and game logic """ # Calculate speed based on the keys pressed self.player_sprite.change_x = 0 # self.player_sprite.change_y = 0 if self.left_pressed and not self.right_pressed: self.player_sprite.change_x = -PLAYER_MOVEMENT_SPEED elif self.right_pressed and not self.left_pressed: self.player_sprite.change_x = PLAYER_MOVEMENT_SPEED # Call update on all sprites (The sprites don't do much in this # example though.) self.physics_engine.update() # Scroll the screen to the player self.scroll_to_player() def scroll_to_player(self): """ Scroll the window to the player. if CAMERA_SPEED is 1, the camera will immediately move to the desired position. Anything between 0 and 1 will have the camera move to the location with a smoother pan. """ position = self.player_sprite.center_x - self.width / 2, \ self.player_sprite.center_y - self.height / 2 self.camera_sprites.move_to(position, CAMERA_SPEED) def on_resize(self, width, height): """ Resize window Handle the user grabbing the edge and resizing the window. """ self.camera_sprites.match_window() self.camera_gui.match_window() def main(): """ Main function """ window = MyGame(DEFAULT_SCREEN_WIDTH, DEFAULT_SCREEN_HEIGHT, SCREEN_TITLE) window.setup() arcade.run() if __name__ == "__main__": main() |
29.3. Additional Information
See the Simple Platformer Tutorial.
For more advanced usage, see Platformer with Physics.